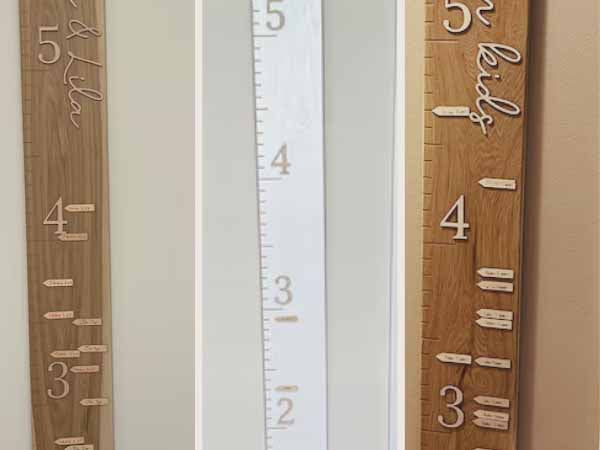
As moms, we know how important it is to treasure every milestone in our children's lives. From their first steps to their first day of school, each moment is a precious memory we want to hold onto forever.
That's why marking their growth is such a special tradition for many of us. But let's face it, figuring out how to make those marks on a growth ruler can feel like a big decision. It's a mix of excitement and a touch of overwhelm.
In this guide, let's dive into different considerations and methods for making those marks on your growth rulers, so we can feel confident as we preserve these memories and cherish them for years to come.

Planning Ahead: The ‘Where’
Planning ahead for marking your growth ruler is crucial as it allows you to consider factors such as where the marks will be placed, how they will look over time, and how to accommodate future growth. By taking the time to plan, you ensure that the process is organized and intentional, resulting in a beautifully crafted record of your child's growth.
Determine Mark Placement:
Start by deciding where you'll make the marks on the ruler.
-
Some moms prefer marking straight down the center.
-
Others opt for placing them closer to the inch marks, weaving around the numbers.
-
You might also consider aligning the marks down the right side of the ruler for a clean and organized look.
Mom Tip: Think ahead to when your kids will be taller, and whether your future marks will align with your current vision.
Planning for Multiple Children:
- If you’re using the ruler for more than one child, think about how their marks will coexist on the growth ruler. You can choose to intermingle their marks or designate separate sections for each child. For example, you might decide that the right side of the ruler is for your oldest child, while the left side is for your youngest.
Mom Tip: Be flexible in your plan for mark placement; if your kids grow at similar rates, their heights may overlap at some point and you’ll want room for everyone’s marks.
Planning Ahead: The ‘How’
Thinking through how you'll be making each mark helps you avoid potential mistakes or inconsistencies, ensuring that your growth ruler will have a cohesive look for years to come. As you put thought, care, and attention toward the small details, you're ensuring that your growth ruler becomes a meaningful keepsake for your family.
Writing Directly on the Board:
It's important to choose the right writing tool and technique to ensure your marks will be readable and long-lasting.
- Consider the thickness and the tip of your marker - chisel, brush, bullet, rounded, or fine-point are common options, each giving a different look to your writing.
- Consider the color of the ink for the best visibility. For example, a thin black marker will be hard to see on a dark ruler such as walnut, whereas that same marker might look great on a white ruler.
- Look for markers that won't bleed or fade over time. These are typically alcohol-based (vs. water-based) or archival quality.
- Consider testing different markers on the back or an inconspicuous area (like low on the side).
- Your local craft store likely has a wide selection of markers to choose from, if your junk-drawer is coming up empty.
Using Arrows or Attachments:
If you don’t like your handwriting, or if you’re nervous about making a mistake, growth ruler accessories might be the option for you.
- Small arrows can be used to signify each milestone.
- You can personalize with your child’s name, age, or date before attaching it to your ruler.
- Make a small mark on the board to note where you want the arrow to go. Use wood glue, super glue, or clear school glue on the back of the arrow and press firmly to the board, covering your mark. You can use a strip of painter’s tape to hold it in place while it dries.
- Extra bags of arrows are available for purchase if you need more.
Making marks on hardwood growth rulers is more than just measuring height; it's about preserving the memories of our children's growth and milestones. By carefully considering mark placement and planning for the future, we can ensure that our growth rulers become cherished keepsakes in our families for generations to come.
Whether you choose to write directly on the board or use decorative elements to mark the milestones, the most important thing is to capture these moments with love and care. So let's embrace this tradition, craft memories, and watch as our children grow right before our eyes.


